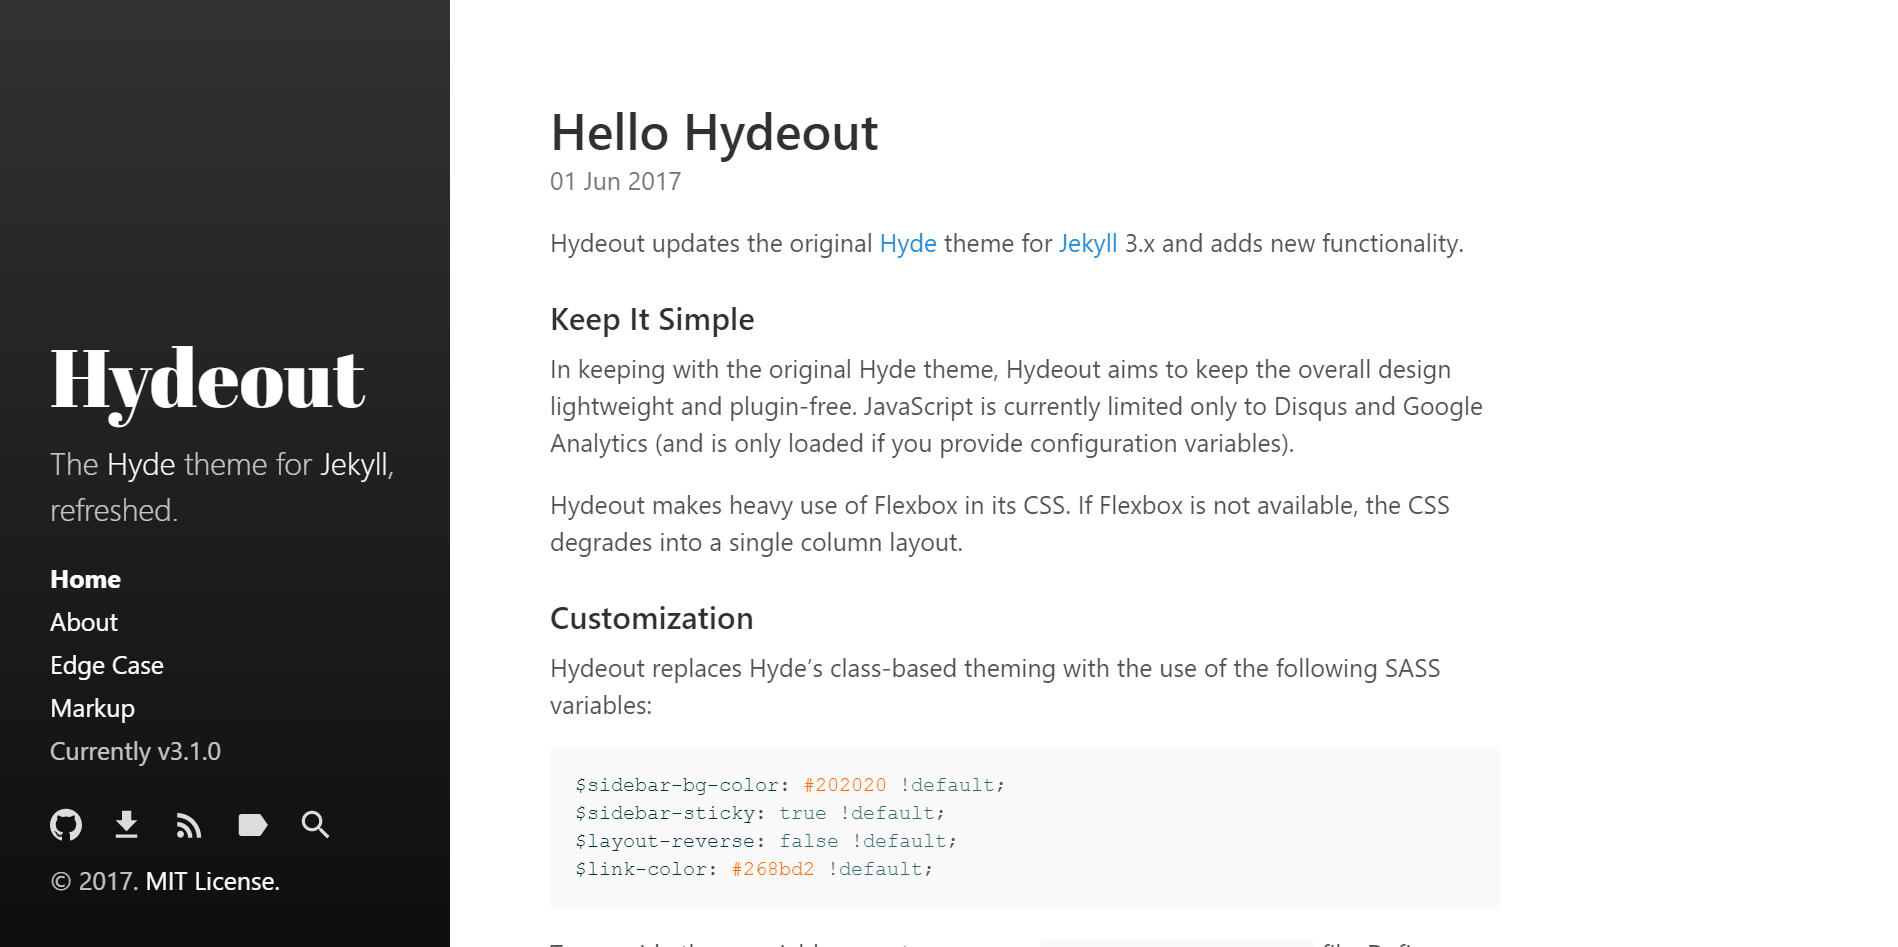
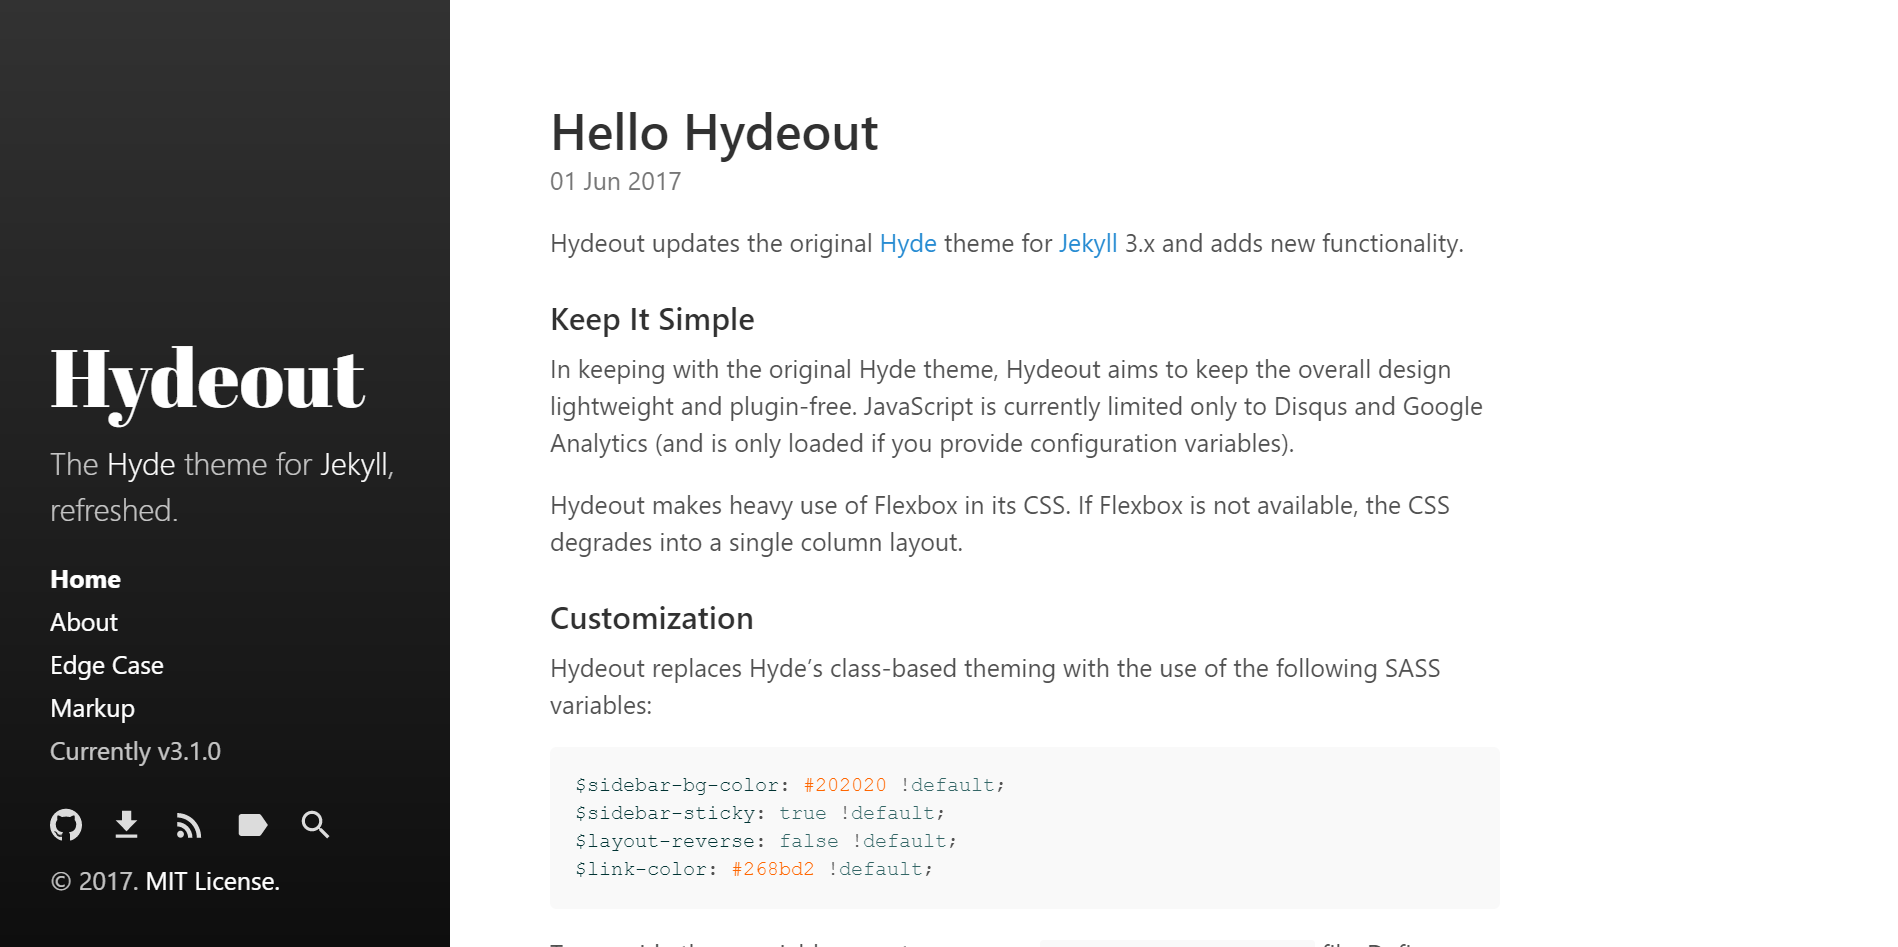
This website was built using Jekyll (a static site generator) and Hydeout (theme + additional functionality). I initially tried to use Jekyll and Hyde (the top google search results point to this solution), but turns out - the latest version of Jekyll doesn’t work properly with Hyde!

This part 1 of the tutorial has all the steps for creating the basic website and getting it up and running. Part 2 addresses customization required to make it look nice and personalize some functionality.
Pre-requisites
Some hard and soft pre-requisites for building this type of site:
- Have a github account and have some basic understanding of how github repositories work.
- Note that user and organization Github pages live in a special GitHub repository dedicated to only the GitHub Pages files. This repository must be named after the account name. For example, @sharathbennur’s user page repository has the name sharathbennur.github.io.
- Content from the master branch of your repository will be used to build and publish the GitHub Pages site, so make sure your Jekyll site is stored there.
-
Comfort with some basic programming tasks and the command line, or are willing to learn (either using Google or ChatGPT etc.).
-
Know how to write in markdown files or are willing to learn (guide-1, guide-2).
- Some knowledge of
htmlandcssare really helpful but not required if you don’t plan to customize the look and feel of the site.
Steps to get the site up and running
- The first step is to install Jekyll
- The second step is to get the Hydeout repo, you can do this in one of two ways
- Download the zip file using the
<> Codebutton on the repo homepage, unzip to your preferred location - Fork the repository to your own github account - the advantage of this would have been to enable easy syncing of updates to your repo. Then checkout this new repo on your account to your preferred location.
- Download the zip file using the
- If you decided to download the repository as a zip file, you have a couple of extra steps to get your repository synced with github
- Make sure that your
index.mdfile is in the root folder of your repo before the intializing the git repository. - Navigate to the root folder of your repository (which contains the
index.mdfile using command line and rungit init- this initialzes your folder as a git repository - You still have to tell your local git repo where the corresponding remote git repository is located. This can be done using the following commands:
git remote add origin https://github.com/{your_github_username}/{your_repo}.git # For example: git remote add origin https://github.com/sharathbennur/sharathbennur.github.io.git - Make sure that your
- Update your
_config.ymlfile as needed. Some fields to update are:- title
- tagline
- description
- url
- baseurl - this determines the root of your website (
{your_github_username}.github.io/or{your_github_username}.github.io/hydeout) - author
-
Navigate to where you setup your git repository from the command line and run
bundle exec jekyll serve. If you have Ruby and Jekyll setup correctly, navigating tohttp://127.0.0.1:4000/hydeout/should show you a basic website identical to the Hydeout homepage.
-
In my installation, I needed to install some additional gems before the previous step worked:
sudo gem install jekyll jekyll-gist jekyll-sitemap jekyll-seo-tag bundle rake jekyll sudo gem add webrick -
I ended up customizing many elements of my Jekyll+Hydeout project, details are in Part 2. If you want to use the project as is, here are some suggested next steps:
- Update the content in the following files:
- about.md - typically for content either about the author/s or the site
- LICENSE.md - IMPORTANT to specify what type of copyright you want to assign to your content
- Optional - README.md - its the page displayed at the root of your github project
- Remove most (if not all) of the posts that come in the
_postsdirectory. Note: this does leave you with an empty homepage, so be prepared to add some content ASAP. - Create a new folder called
_drafts(for draft posts). -
Add some new pages in the
categoryfolder and remove / update any files there that are not required. Pages in this folder allow you to add a page and link to the sidebar. Note that you can determine the order of links in the sidebar using thesidebar_sort_orderinstruction in the page header.--- layout: category title: Fancy Title category: My Category sidebar_sort_order: 2 ---
- Update the content in the following files:
-
Before publish your website on
{your_github_username}.github.io, do make sure that you have added your own content, categories, blog posts and other pages to the project - commited them and pushed them to themasterbranch of your{your_github_username}.github.iorepository.Once you have your content ready to publish, its time to publish on Github Pages. These instructions are loosely based on this guide
- Go to the Settings tab on your repository.
- Click Pages under Code and automation.
- Change Source under Build and deployment from
Deploy from a branchtoGitHub Actions. - Upon doing this - Github suggested creating a Jekyll Action workflow and I just followed the suggested steps, so the next step #2 only applies if that doesn’t work for you.
- Go to the Actions tab on your repository.
- Start a New workflow and search for Jekyll.
- Click Configure under the Jekyll workflow (not GitHub Pages Jekyll workflow).
- Review the change and click Commit changes.
-
Now any local changes pushed to the
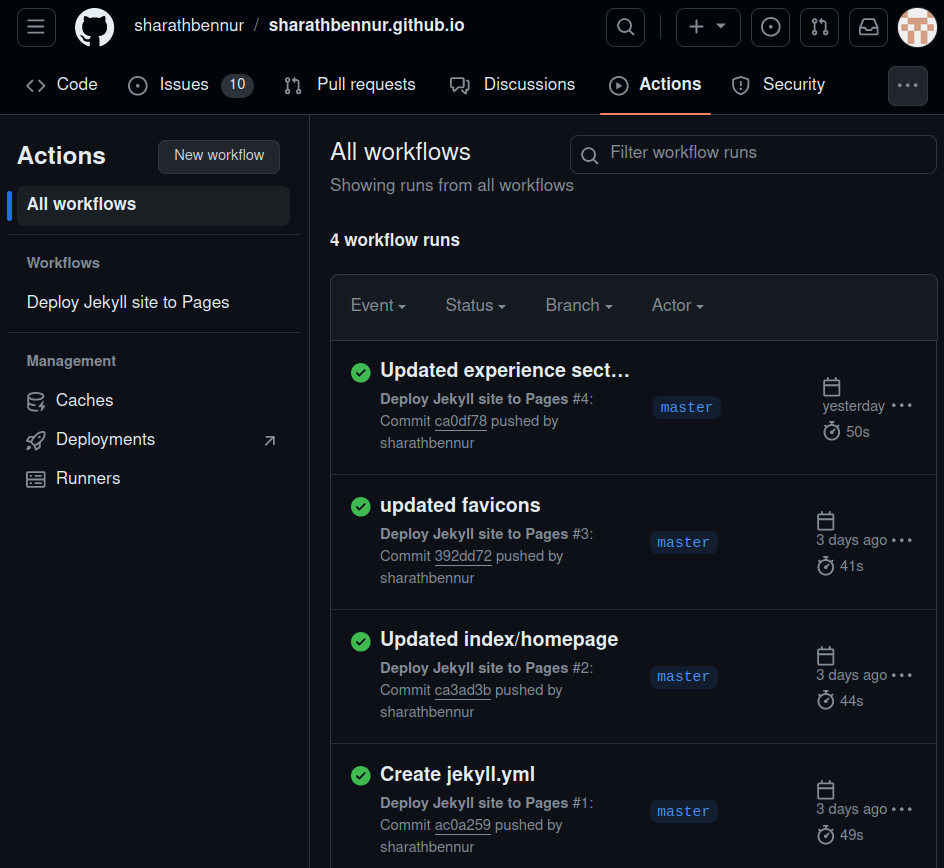
masterbranch will trigger the ‘action’ and the static site will start building and deploy. You can see build statuses in the ‘Action’ tab for your project:
- Check
https://{your_github_username}.github.ioto see if your site was published 😎
- Go to the Settings tab on your repository.
Final thoughts & considerations
Finally, some things to keep in mind:
-
Though Jekyll suggest updating the
Gemfilein your root directory, be aware that Hydeout also uses the*.gemspecfile in your root directory. -
You can replace the favicon that comes with the Hydeout theme with your own favicons. I used this generator online.
-
Jekyll is a static site generator - meaning it uses the markdown, configuration, html & asset files provided to create a static html website at runtime. If you want to delete and recreate the static files at any time - run
jekyll cleanfollowed bybundle exec jekyll serveagain.